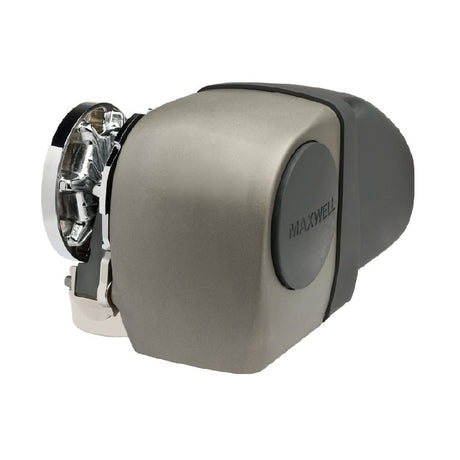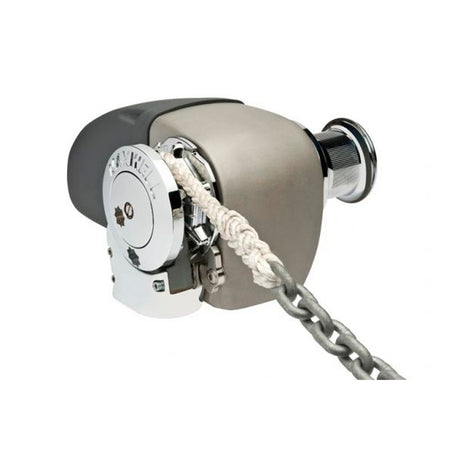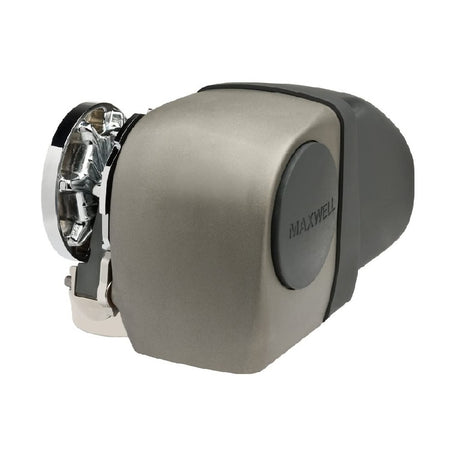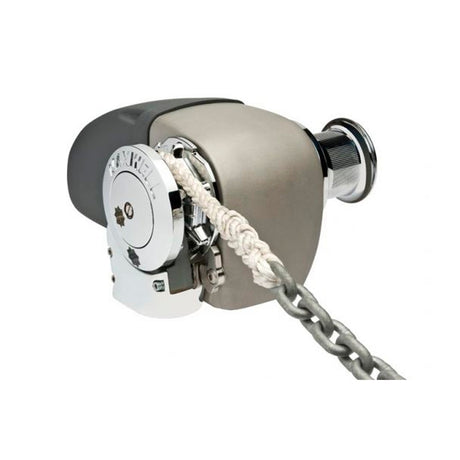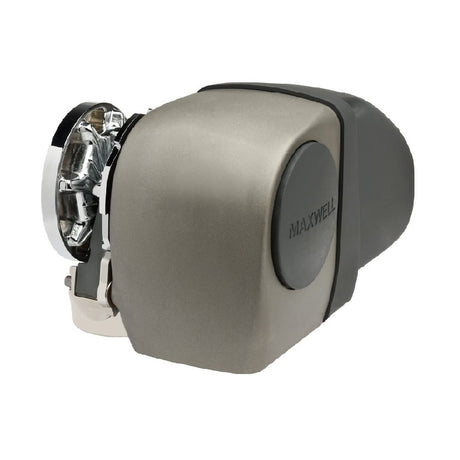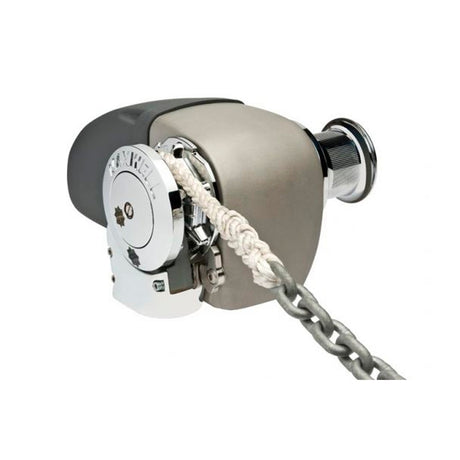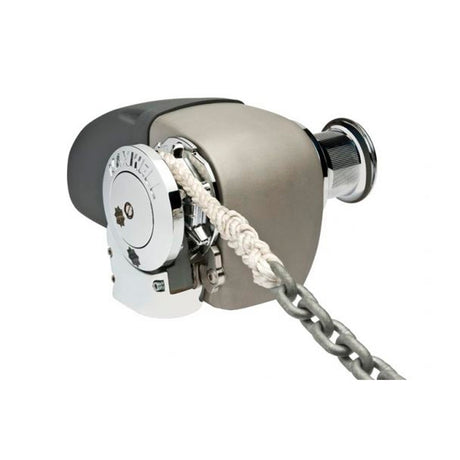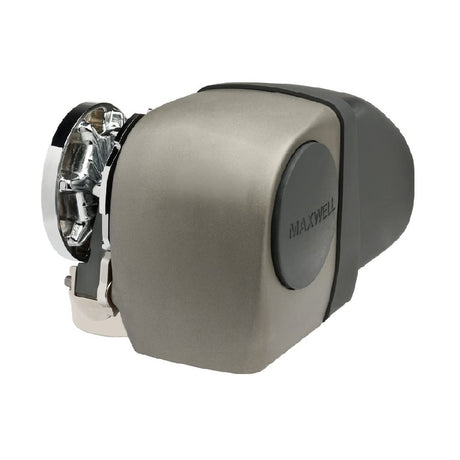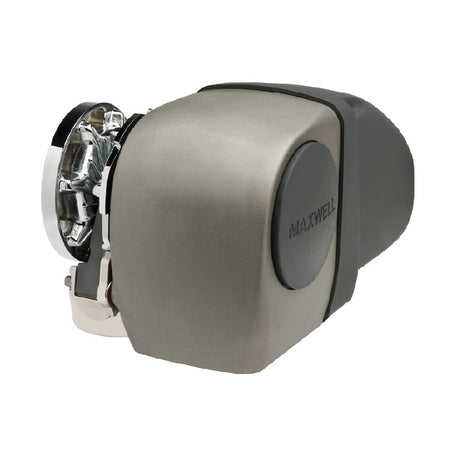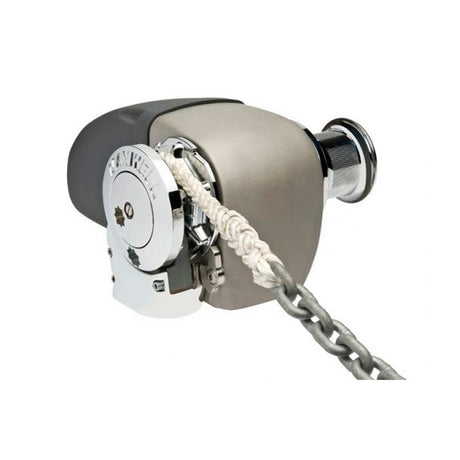




Maxwell HRC10 Horizontal Windlass — Owner's Manual

Specifications, cable sizing, installation, wiring and hydraulic data, anchoring and capstan operation, maintenance, troubleshooting and the full parts lists for the Maxwell HRC10-8 and HRC10-10 horizontal rope/chain windlass.

Specifications
| Item | HRC10-8 | HRC10-10 |
|---|---|---|
| Power supply | 12V/24V DC, Hyd | 12V/24V DC, Hyd |
| Motor power | 1000W | 1200W |
| Working load | 700kg (1540 lbs) | 850kg (1870 lbs) |
| Haulage speed (dependant on the load) | 20-24 m/min (65.6-78.7 ft/min) | 20-24 m/min (65.6-78.7 ft/min) |
| Rope size | 14-16mm (9/16"-5/8") | 16mm (5/8") |
| Chain size (short link) | 8mm (5/16") | 10mm (3/8") |
| Circuit breaker/isolator | 12V: 135amp · 24V: 80amp | 12V: 135amp · 24V: 80amp |
Hydraulic Version
| Windlass | Motor | Recommended flow | Relief valve pressure setting |
|---|---|---|---|
| HRC10 | P14366 (Gresen MGG2-16) | 20 l/min (5.3 US gal/min) | 2000 PSI (138 bar) |
Hydraulic circuit: windlass motor, dual direction solenoid control valve (open centred in neutral), relief valve, pump, suction filter, tank and return line filter. Make sure the hydraulic components suit the recommended flow.
Location & Fitting
- In the box: clutch handle (bi-square handle), deckplate gasket, deck cut-out details (rear of manual), bi-square to 1/2" square adaptor, small parts, windlass.
- Plan the location: rode feeds correctly, flat deck (plinth if not), avoid bulkheads, wiring and piping, strong enough mounting area, at least 200mm (8") unobstructed fall into the locker from the lowest part of the windlass, clear run from bow roller to chainwheel, room to work the clutch handle.
- Use the deck cut-out template (part no. 7379, in the PDF): check the scale, align the gypsy with the bow roller and cut the holes in order A to C.
- Seal hole edges with epoxy (not for steel or aluminium), lower the deckplate into place and tighten the nuts progressively and evenly – firm, not over-tight, no power tools.
- If you use a sealant, avoid permanent adhesive: use a non-acid cure flexible sealant.
Electrical
- Wiring by qualified technicians to USCG, ABYC, NMMA, CE requirements. A circuit breaker/isolator and an up/down control switch are required.
- Breaker/isolator no further than 1.8 m (6 ft) from the battery, accessible and dry. Solenoid pack in a dry area close to the windlass, not in the chain locker.
- Footswitch approximately 500 mm (20") from the windlass, below-deck part dry, arrow showing the direction; up/down switch where the operator can see the windlass.
- Hold the lower motor nut (A1) while tightening the upper nut (B1). Swapping F1 and F2, or connections 1 and 3 on the solenoid box, reverses rotation: check it before fitting chain or rope.
- Ring terminals and sleeved terminations; once tested, seal terminals with CRC2403 “plasti-coat”, CRC3013 “soft seal” or CRC2409 “clear urethane”.
- HRC10-8 and HRC10-10 use a series wound motor; the control circuit uses a manually resettable 3 Amp breaker.
| Cable length | HRC10-8 12V | HRC10-8 24V | HRC10-10 12V | HRC10-10 24V |
|---|---|---|---|---|
| 0-10m (35') | 25 mm² / 3 AWG | 10 mm² / 6 AWG | 26 mm² / 3 AWG (as printed) | 10 mm² / 6 AWG |
| 10-15m (35'-50') | 35 mm² / 2 AWG | 10 mm² / 6 AWG | 34 mm² / 2 AWG (as printed) | 10 mm² / 6 AWG |
| 15-20m (50'-65') | 50 mm² / 1 AWG | 16 mm² / 4 AWG | 42 mm² / 1 AWG (as printed) | 16 mm² / 4 AWG |
| 20-25m (65'-82') | 70 mm² / 0 AWG | 16 mm² / 4 AWG | 54 mm² / 0 AWG (as printed) | 16 mm² / 4 AWG |
| 25-30m (82'-99') | 70 mm² / 00 AWG | 25 mm² / 4 AWG | – | 22 mm² / 4 AWG (as printed) |
| 30-35m (99'-115') | 95 mm² / 000 AWG | 25 mm² / 3 AWG | – | – |
| 35-40m (115'-132') | 95 mm² / 0000 AWG | 35 mm² / 3 AWG | 68 mm² / 00 AWG (as printed) | – |
Cable length is the total run battery → windlass → battery; sizes keep voltage drop under 10% (copper, 90° C insulation). The HRC10-10 rows are printed with non-standard sizes and blank (0) cells for the longer runs: confirm with us before buying cable for an HRC10-10.
Anchoring
- Lowering: make sure the pawl is disengaged, press down on the up/down switch (or Down footswitch), watch the rode and tie off on a chain stopper, snubber or cleat.
- Raising: tighten the clutches with the clutch handle (clockwise) only enough to pull up the anchor – over-tightening can damage the motor when docking the anchor – remove the handle, press up, motor up to the anchor and bring in the last meter (3') slowly.
- Free fall: loosen the clutch nut slowly anticlockwise; turning it clockwise controls the rate of descent. Never let free fall go out of control.
- Manual recovery: engage the pawl, loosen the clutch anticlockwise, then fit the handle in the outer bi-square of the chainwheel and turn clockwise to pull in the line.
Safety
- Your windlass must have a working load limit at least three times the combined weight of anchor and rope/chain; the anchor must fit the bow roller and be self-launching.
- Tie the bitter end to a secure fixture in the locker. Never operate from a remote station without a clear view of the windlass.
- Never use the windlass as a mooring point, to pull the boat up to the anchor, to break out a fouled anchor or to haul a person up a mast: use cleats, bollards and the engine.
- Secure the anchor when under way; switch the breaker/isolator off when the windlass is not in use. Never reverse before the windlass has stopped.
Capstan Drum (Rope Warping)
- The drum works independently of the chainwheel, for mooring lines or a second anchor; a footswitch is highly recommended.
- Make sure the anchor is secured.
- Turn the clutch nut anticlockwise until rotation stops so the chainwheel stays still.
- Wind up to three turns clockwise on the drum, keep a light tailing pull and start with the UP footswitch.
- Increase the pull and tail hand over hand; reduce pull to slip the rope; to hold, stop the windlass while keeping pull on the rope.
Schedule
| When | Task |
|---|---|
| After use | Check the clutch is adjusted correctly; wash topworks with fresh water; spray motor and connections with CRC Soft Seal; check and rinse the rope. |
| Every 3 months | Remove the chainwheel, strip and grease the clutch faces; split the gearbox from the main case, clean and re-grease the mating faces; check the gearbox oil level at the sight glass (service the gearbox if low). |
| Every year | Clean with a cloth damp with kerosene (paraffin), spray with CRC3097 “Long Life” (or CRC6-66 / WD40) and polish off; motor serviced by a qualified technician; remove rust and repaint the casing. |
| Every 3 years | Gearbox and motor serviced by an authorized service agent. |
- Gearbox oil: 70 – 80ml (2.4 – 2.7 fl oz), 1/2 to full on the sight glass; API GL-4 or lower (low sulphur), 90 to 110 weight.
- Main shaft, bearing and clutch surfaces: lithium complex grease, NLGI No.1 to No.3.
- Seat the keys properly on reassembly; never wrap the motor in grease cloth.
Troubleshooting
- Does not operate: breaker/isolator on; connections at up/down switch, footswitches, breaker, reversing solenoid and motor; battery condition; solenoid clicks when activated.
- Motor runs, chainwheel does not turn: clutch nut too loose; chainwheel jammed (reverse to free it); rough running or excessive noise means the gears may be damaged.
- Rope does not retrieve or pay out: wrong rope size/type; fouled rope or anchor; twists or knots in the chain pipe; worn or stiff rope (wash in fresh water with fabric softener); too much rope in the locker; worn splice; rough deck hole; twisting chain (fit a swivel).
- Runs slowly: power cable too small, low battery voltage, worn motor brushes.
Windlass Parts


| Part no. | Description | |
|---|---|---|
| SP0172 | Capscrew M6×20 | Ask us to source it → |
| SP0439 | Washer M6 | Ask us to source it → |
| 6914C | Clutch nut | View part → |
| 6090 | Clutch cone upper | Ask us to source it → |
| SP0484 | Belleville washer | View part → |
| SP4503 | Capscrew M5×12 | Ask us to source it → |
| P103315 | Chainwheel 8mm (pre-assembled kit) | View part → |
| P103316 | Chainwheel 10mm (pre-assembled kit) | View part → |
| 6915 | Stripper | View part → |
| SP0488 | Belleville washer | View part → |
| P104723 | Shaft (pre-assembled kit) | Ask us to source it → |
| P104724 | Shaft, no drum version (pre-assembled kit) | Ask us to source it → |
| 7347 | Pressure arm | View part → |
| 7037 | Pressure arm spring | View part → |
| SP4509 | Capscrew M6×70 | Ask us to source it → |
| SP0474 | Spring washer | Ask us to source it → |
| 7346 | Chain pipe | Ask us to source it → |
| 3462 | Key | View part → |
| SP2758 | Quad ring | Ask us to source it → |
| SP3519 | Plug | Ask us to source it → |
| SP3518 | Bush | Ask us to source it → |
| 4218 | Deckplate bearing | Ask us to source it → |
| SP0194 | Capscrew M10×20 | Ask us to source it → |
| 7400 | Spacer | Ask us to source it → |
| 7362 | Pawl | Ask us to source it → |
| SP0424 | Washer M12 | Ask us to source it → |
| 7395 | Gasket | Ask us to source it → |
| SP0371 | Nut M10 | Ask us to source it → |
| SP0466 | Spring washer M10 | Ask us to source it → |
| SP0423 | Washer M10 | Ask us to source it → |
| 5225 | Stud M10×125mm | Ask us to source it → |
| 7344 | Main case | Ask us to source it → |
| SP0878 | Circlip 1-1/8" SS | View part → |
| 7502 | Drum SS | Ask us to source it → |
| 3467 | Retaining washer | View part → |
| SP0064 | Screw csk slot M8 | Ask us to source it → |
| 3465 | Cap | View part → |
| 7401 | Cover (no drum version only) | Ask us to source it → |
| SP2798 | O-ring 178×3 | Ask us to source it → |
| SP0254 | Bolt M8×20 | Ask us to source it → |
| SP0467 | Spring washer M8 | Ask us to source it → |
| SP0413 | Washer M8 | Ask us to source it → |
| SP0288 | Bolt M8×25 (kit P12487) | Ask us to source it → |
| P12436 | Gearbox 56:1 | View part → |
| SP2787 | O-ring (kit P12487) | Ask us to source it → |
| P12072 | Motor 12V 1000W | View part → |
| P12073 | Motor 12V 1200W | View part → |
| P12074 | Motor 24V 1200W | View part → |
| 7345 | Motor cover | View part → |
| 7361 | Label | Ask us to source it → |
| SP4511 | Capscrew M6×45 | Ask us to source it → |
| SP0175 | Capscrew M6×25 | Ask us to source it → |
| SP3216 | Bolt (kit P12488) | Ask us to source it → |
| P14366 | Motor hydraulic | View part → |
| 3625 | Washer M8 (kit P12488) | Ask us to source it → |
| SP0366 | Nut M8 (kit P12488) | Ask us to source it → |
Kits & Accessories
| Part no. | Kit | |
|---|---|---|
| P103315 | HRC10-8 8mm chainwheel assembly kit: 7374C chainwheel outer 8mm, 7375C chainwheel inner 8mm, 6915 stripper, SP4503 cap screws M5×12, SP4121 magnet | View part → |
| P103316 | HRC10-10 10mm chainwheel assembly kit: 7376C chainwheel outer 10mm, 7377C chainwheel inner 10mm, 6915 stripper, SP4503 cap screws M5×12, SP4121 magnet | View part → |
| P104723 | HRC10 shaft kit – single chainwheel/single drum: SP0172 cap screw M6×20, SP0439 washer M6, clutch cone lower, 7425 mainshaft, SP2758 quad ring | Ask us to source it → |
| P104724 | HRC10 shaft kit – single chainwheel: SP0172 cap screw M6×20, SP0444 washer M6, clutch cone lower, 7348 mainshaft, SP2758 quad ring | Ask us to source it → |
| P12487 | Motor bolt kit: SP0288 hex bolts M8×25, SP0413 flat washers, SP0467 spring washers, SP2787 O-ring 50×2 | View part → |
| P12488 | Motor bolt kit – hydraulic: SP0467 spring washers, SP0413 flat washers, SP3216 bolts hex M8×35, 3625 washers, SP0366 nuts | View part → |
| P100807 | Replacement brush kit motor 12V | View part → |
| P100808 | Replacement brush kit motor 24V | View part → |
| P90006 | Gearbox seal kit | View part → |
| 7369 | Bi-square to 1/2" drive adaptor | View part → |
| P103864 | Bi-square handle 8" | View part → |
Need a part that isn't listed? Ask us to source it and quote the part number from the PDF.
Products in this Manual
-

-
-
-

Maxwell Chainwheel assy HRC10-8 (8mm - 5/16")
MAXP103315
$476.00 USDList Price: $584.42 USDUnit price /Unavailable -
Maxwell Windlass - HRC 10-10 LP 1.60 HP Horizontal Hydraulic Gypsy Only 3/8" - BBB
MAXHRC1010HYDLP
$4,209.22 USDList Price: $5,261.53 USDUnit price /Unavailable -
Maxwell Windlass - HRC 10-10 1.60 HP Horizontal Hydraulic Gypsy + Drum 3/8" - BBB
MAXHRC1010HYD
$4,209.22 USDList Price: $5,261.53 USDUnit price /Unavailable -
Maxwell Windlass - HRC 10-8 LP 1.87 HP Horizontal Hydraulic Gypsy Only 5/16" - BBB
MAXHRC108HYDLP
$3,867.81 USDList Price: $4,834.76 USDUnit price /Unavailable -
Maxwell Windlass - HRC 10-8 1.87 HP Horizontal Hydraulic Gypsy + Drum 5/16" - BBB
MAXHRC108HYD
$3,867.81 USDList Price: $4,834.76 USDUnit price /Unavailable -
Maxwell Windlass - HRC 10-10 LP 1200W Horizontal Electric 24V Gypsy Only 3/8" - BBB
MAXHRC101024VLP
$3,754.10 USDList Price: $4,692.62 USDUnit price /Unavailable -
Maxwell Windlass - HRC 10-10 1200W Horizontal Electric 24V Gypsy + Drum 3/8" - BBB
MAXHRC101024V
$3,754.10 USDList Price: $4,692.62 USDUnit price /Unavailable -
Maxwell Windlass - HRC 10-10 1200W Horizontal Electric 12V Gypsy + Drum 3/8" - BBB
MAXHRC101012V
$3,754.10 USDList Price: $4,692.62 USDUnit price /Unavailable -
Maxwell HRC10-8 12v 5/16" chain & 5/8" rope 1200 watt
MAXHRC10812V1200W
$3,754.10 USDList Price: $4,692.62 USDUnit price /Unavailable -
Maxwell Windlass - HRC 10-8 LP 1000W Horizontal Electric 24V Gypsy Only 5/16" - BBB
MAXHRC10824VLP
$3,412.68 USDList Price: $4,265.85 USDUnit price /Unavailable -
Maxwell Windlass - HRC 10-8 LP 1000W Horizontal Electric 12V Gypsy Only 5/16" - BBB
MAXHRC10812VLP
$3,412.68 USDList Price: $4,265.85 USDUnit price /Unavailable -
Maxwell Windlass - HRC 10-8 1000W Horizontal Electric 12V Gypsy + Drum 5/16" - BBB
MAXHRC10812V
$3,412.68 USDList Price: $4,265.85 USDUnit price /Unavailable