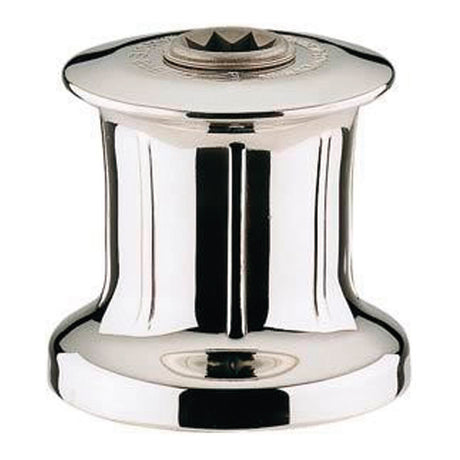




Andersen Winch 10 — Exploded View & Mounting Instructions

Mounting, service, parts list and the 1:1 base template for the Andersen Winch 10, ver. 2.1, non self tailing classic winch.
Download PDF ▾

Mounting Instruction
- Remove circlip (1) with a small sharp screwdriver, then the drum (2).
- Mark the bolt holes using the winch base (11) as a template, then remove the base so no drilling dust gets into the winch.
- Drill the bolt holes ø6.5mm and clean the area.
- Apply a light coat of bedding compound so each hole is bedded; keep drain grooves clear.
- Fasten the winch with 4 pcs. M6 countersunk head screws, reassemble in reverse order and check it works correctly.
Mounting Template
- Winch base 92mm (3 5/8").
- 6.50mm (1/4") holes x 4, equally spaced on a 65mm (2 9/16") P.C.D.
- Product No. RA500010 (template RON-WMT-10-Rev.1).
Print the template at full size (1:1) on A4 and check it against the dimensions shown before drilling.
Service Instruction
Maintenance interval 1-2 years, depending on operating conditions.
- Remove circlip (1) and drum (2).
- Remove the black plastic circlip (8), the drive shaft (6) and the bearing bushing (7).
- Clean all moving parts with benzine.
- Check pawls and springs for wear and replace if necessary. To replace the upper pawls (5) or springs (4), remove the gliding washer (3).
- Reassemble in reverse order, lightly greasing all moving parts with a soft, small brush, and check the winch works correctly.
Andersen recommends always using ANDERSEN WINCH GREASE (silicone/Teflon®); most other greases, including "marine grease", are not suitable. Malfunctioning pawls may lead to unexpected failure of a loaded winch. Service Kit No. 4 (part no. 710004) contains the service parts for this winch.
Exploded View & Parts List

| Part No. | Pos. | Description | |
|---|---|---|---|
| 712800 | 1 | Circlip | Ask us to source it → |
| 775210 | 2 | Drum | Ask us to source it → |
| 718400 | 3 | Gliding washer | Ask us to source it → |
| 713300 | 4 | Pawl spring | View part → |
| 713200 | 5 | Pawl | View part → |
| 712702 | 6 | Drive shaft, complete | Ask us to source it → |
| 782910 | 7 | Bearing bushing | Ask us to source it → |
| 716001 | 8 | Circlip | Ask us to source it → |
| 713200 | 9 | Pawl | View part → |
| 713300 | 10 | Pawl spring | View part → |
| 713101 | 11 | Winch base | Ask us to source it → |
| 710004 | – | Service Kit No. 4 | View part → |
Safety Notes (all winches)
- Read the safety notice and manual before installing or operating; anyone operating the winch must be trained and aware of the hazards.
- Keep children and unqualified people away from the winch and loaded rigging; tie back long hair and loose clothing.
- Remove winch handles when the winch is not in use.
- For lifting operations the rope must not be in the self tailer, and the self tailer must never be used as a cleat for a rope that lifts or holds an object; tie off or use a cleat or bollard. Two persons should conduct any lifting operation.
Need a part that isn't listed? Ask us to source it and quote the part number from the PDF.
Products in this Manual
-

-
-

Andersen Winch Service Kit - 4 for 10, 16, 28, 40 and 46 Standard Winches
AND710004
$64.58 USDUnit price /Unavailable -
Andersen Plain Top Winch Model 10 - Stainless Steel / One Speed
AND500010
$239.69 USDUnit price /Unavailable