Lewmar EVO Winch — Installation Guide

How to bolt down, operate and adjust the self-tailer on Lewmar EVO winches, with the rope diameter range for each size from 15ST to 70ST.

Fitting Your Winch
- Remove the drum.
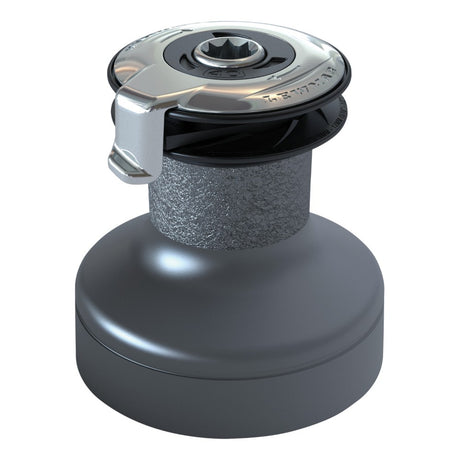
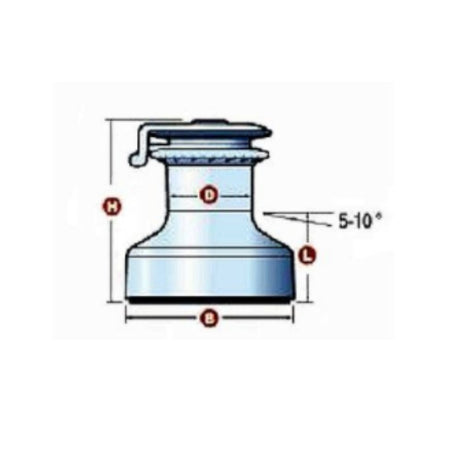
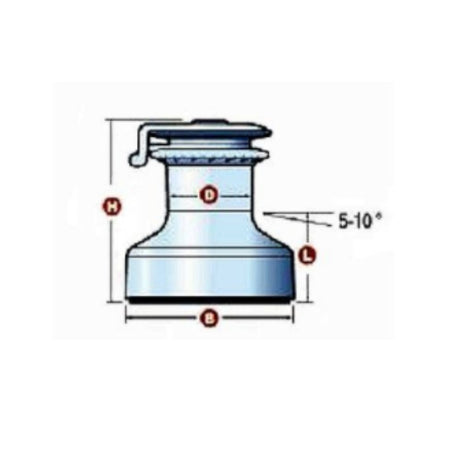
- Position the winch base for the best possible output gear support (see the diagram in the PDF), and make sure the gears can still be removed for servicing.
- Mark the bolt holes, remove the winch and drill.
- Apply bedding compound or marine silicone sealant around the bolt holes and under the countersunk screw heads.
- On aluminium or a similar metal foundation, fit an insulation gasket.
- Bolt the winch down, tightening the bolts progressively; clean off surplus compound.
- Refit the drum and check that the winch operates correctly.
Remember
- A loaded winch stores a lot of energy you cannot see: release the load by easing turns off the drum with great care.
- Always put three or more turns on the drum; add extra turns for very high loads.
Servicing is not covered in this sheet: Lewmar refers you to its EVO service guide.
Operating Your Winch
| Winch | Handle direction | Result |
|---|---|---|
| One-speed self-tailing (15ST) | Anti-clockwise | Drives the drum |
| Clockwise | Ratchet action | |
| Two-speed (30ST, 40ST, 45ST, 50ST, 55ST, 65ST) | Anti-clockwise on self-tailing 2-speed winches | 1st gear (highest gear = fastest speed) |
| Opposite direction | 2nd gear (lowest gear = slowest speed) |
The English text first says clockwise drives 1st gear, then notes that on all self-tailing 2-speed winches 1st gear is anti-clockwise (as printed).
Wavespring Self-Tailers
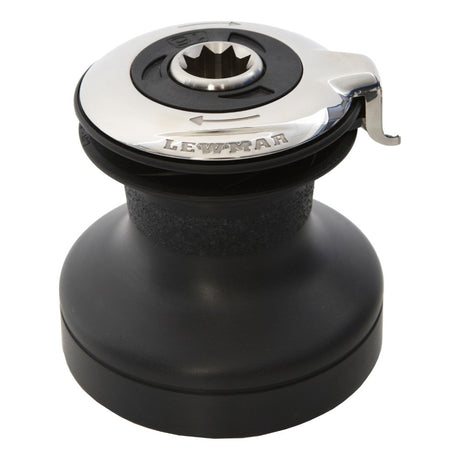
- Lead the turn coming off the drum across the stripper and seat it in the spring jaws.
- Mount the winch so the loose tail falls into a secure stowage position; the stripper arm position can be adjusted for correct stripping.
- Keep a minimum of three turns on the drum.
- Load is still present when you release the line from the jaws: ease it away with care, then take it off the drum.
- Use only the rope sizes recommended for the winch size.
Adjusting the Self-Tailer
- Remove the top cap and feeder arm.
- Rotate the stripper ring to the position you need: it moves in 8 × 45° increments with the winch bolted in place.
- Refit the feeder arm and top cap.
Rope Range by Winch Size
| Winch size | Rope diameter (mm) | Rope diameter (in) |
|---|---|---|
| 15ST, 30ST, 40ST | 8 – 12 mm | 5/16" – 1/2" |
| 45ST, 50ST | 8 – 14 mm | 5/16" – 9/16" |
| 55ST | 8 – 16 mm | 5/16" – 5/8" |
| 65ST | 8 – 18 mm | 5/16" – 11/16" |
| 70ST | 10 – 20 mm | 3/8" – 3/4" |
Need a part that isn't listed? Ask us to source it and quote the part number from the PDF.
Products in this Manual
-


Lewmar Winch Spare for EVO Size 45 - Stripper Ring Pair
LEWSPR45500308P
$21.99 USDList Price: $31.95 USDUnit price /Unavailable -
Lewmar Winch Spare for EVO Size 50 - Stripper Ring Pair
LEWSPR45500408P
$23.99 USDList Price: $32.95 USDUnit price /Unavailable -
Lewmar Winch Spare for EVO Size 30 to 40 - Jaw Kit
LEWSPR48500031
$59.95 USDList Price: $78.95 USDUnit price /Unavailable -
Lewmar Winch Spare for EVO Size 50 - Jaw Kit
LEWSPR48500051
$84.95 USDList Price: $116.95 USDUnit price /Unavailable -
Lewmar Winch Spare for EVO Size 45 - Jaw Kit
LEWSPR48500046
$59.95 USDList Price: $83.95 USDUnit price /Unavailable -
Lewmar Winch Spare for EVO Size 55 - Stripper Ring Pair
LEWSPR45500508P
$24.99 USDList Price: $34.95 USDUnit price /Unavailable -
Lewmar Winch Spare for EVO Size 55 - Jaw Kit
LEWSPR48500056
$97.95 USDList Price: $133.95 USDUnit price /Unavailable -
Lewmar Winch Spare for EVO Size 30 to 40 - Stripper Ring (pair)
LEWSPR45500108P
$21.99 USDList Price: $31.95 USDUnit price /Unavailable -
Lewmar 65 Evo Feeder Arm Spare
LEW48500069
$137.00 USDList Price: $184.95 USDUnit price /Unavailable -
Lewmar 45 Evo Feeder Arm Spare
LEW48500047
$69.95 USDList Price: $95.95 USDUnit price /Unavailable -
Lewmar Self Tailing Winch EVO Size 50 - Chrome / Two Speed
LEW49550056
$2,550.00 USDList Price: $4,248.95 USDUnit price /Unavailable -
Lewmar Self Tailing Winch EVO Size 30 - Chrome / Two Speed
LEW49530056
$1,210.00 USDList Price: $2,016.95 USDUnit price /Unavailable -
Lewmar Self Tailing Winch EVO Size 15 - Aluminum Black / One Speed
LEW49515055
$715.00 USDList Price: $1,194.95 USDUnit price /Unavailable -
Lewmar Winch Spare for EVO Size 65 - Stripper Ring Pair
LEWSPR45500608P
$25.99 USDList Price: $37.95 USDUnit price /Unavailable -
Lewmar Winch Spare for EVO Size 65 - Jaw Kit
LEWSPR48500066
$122.95 USDList Price: $165.95 USDUnit price /Unavailable -
Lewmar 55 Evo Feeder Arm Spare
LEW48500057
$122.95 USDList Price: $165.95 USDUnit price /Unavailable -
Lewmar 50 Evo Stipper Ring Pack 25
LEW45500408BU
$155.00 USDList Price: $207.95 USDUnit price /Unavailable -
Lewmar 50 Evo Feeder Arm Spare
LEW48500052
$111.95 USDList Price: $151.95 USDUnit price /Unavailable -
Lewmar 45 Evo Stripper Ring Pack 50
LEW45500308BU
$198.00 USDList Price: $274.95 USDUnit price /Unavailable -
Lewmar 30/40 Evo Feeder Arm Spare
LEW48500032
$59.95 USDList Price: $83.95 USDUnit price /Unavailable -
Lewmar 15 Evo Stripper Ring Pair
LEW45500008P
$20.99 USDList Price: $30.95 USDUnit price /Unavailable -
Lewmar 15 Evo Stripper Ring Pack 50
LEW45500008BU
$165.00 USDList Price: $231.95 USDUnit price /Unavailable -
-
Lewmar 15 Evo Feeder Arm Spare
LEW48500017
$53.95 USDList Price: $75.95 USDUnit price /Unavailable