



Ronstan Series 40 Orbit Blocks — User Instructions

How to lash the Series 40 Orbit lashing blocks, free or lock the swivel shackle head, reset the cam-arm angle, swap the RF46000 ratchet sheave, align cheek blocks and drill for the cheek, stand-up and exit blocks.

Lashing Instructions
| Model | Description |
|---|---|
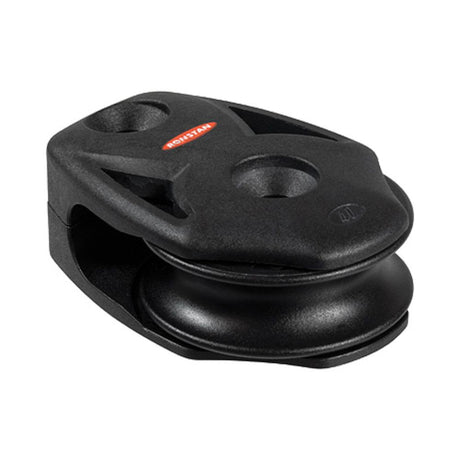
| RF48109 | Single block, lashing hub and becket option |
| RF48209 | Double block, lashing hub and becket option |
| RF48109HL | Single block HHL, lashing hub and becket option |
To meet the stated breaking loads these blocks must be lashed with a lashing, strop or link passing through the central hub. The breaking load depends on the strength of the lashing.
- The breaking load of the assembly (block + lashing) is generally limited by the rope and the joining method: knots, splices and stitching are generally weaker than the rope itself.
- Up to 10mm line can be used in a single pass through the hub; a smaller line with multiple passes gives a neater result and more secure knotting.
- The blocks come with 200mm (8") of 1.0mm (1/16") Dyneema® core twine to secure the lashing tight to the head of the block.
- RF48109 and RF48109HL can be lashed closed with the supplied twine, or each cheek can be lashed separately so the block twists open as a snatch block.
- Attach to a mounting point with a smooth, well-rounded profile. On sharp-edged or rough fittings put a smooth-surfaced shackle between lashing and fitting.
- Lashings degrade from fatigue, wear and UV: inspect them with your running rigging and replace if they show significant wear or fibre damage.
Universal swivel shackle head
To let the block swivel freely
- Remove the shackle, then the blackened stainless steel collar from the headpost.
- Refit the shackle to the headpost without the collar.
To fix the block at 0° or 90°
- Remove the shackle and the collar.
- Rotate the headpost so the cross-drilled hole for the shackle pin is where you want it.
- Refit the collar to lock the headpost, then refit the shackle.
Adjusting the cam-arm angle
| Model | Description |
|---|---|
| RF46330 | Triple block, becket, adjustable cleat, swivel shackle head |
| RF46530 | Quin block, becket, adjustable cleat, swivel shackle head |
| RF48120 | Single block, adjustable cleat, swivel shackle head |
| RF48330 | Triple block, becket, adjustable cleat, swivel shackle head |
- RF46330, RF48120, RF48330: remove the cam-arm screws and cover plates, then back off the screws on both sides of the brace bar by one turn (anti-clockwise). Flex the stainless steel cam arms and remove them.
- RF46530: remove the cam-arm screws and cover plates, then flex the cam arms off the block.
- Reposition the cam arm for the cleat angle you want, refit the cover plates and tighten the screws, then tighten the brace-bar screws.
Replacing the Ratchet Sheave (RF46330, RF46530)
- Remove the cam arms as above.
- Remove the split ring and becket pin, and slide the central ratchet sheave out from the back of the block.
- Slide in the new RF46000 ratchet sheave: it keys into the slots inside the cheeks.
- The ratchet comes engaged from the factory. Check the sense of rotation: the rope must pull smoothly through the cleat and be held by the ratchet when releasing.
- If you want, turn the ratchet on or off with the switch on the side of the sheave (flat screwdriver) before reassembly.
- Refit the becket pin and split ring, reposition the cam arms and finish the assembly as above.
| Part no. | Description | |
|---|---|---|
| RF46000 | Ratchet sheave, Series 40 RT Orbit blocks | View part → |
Cheek Block Alignment & Mounting
- Align cheek blocks so the axis of the block bisects the angle between line entry and exit, with both approximately in the same plane. Misalignment or improper installation reduces the load capacity of the block.
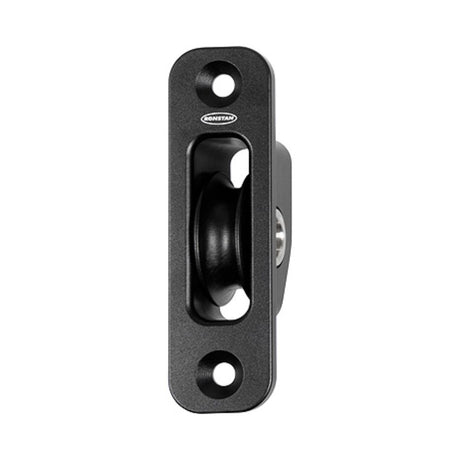
| Product no. | Fastening | Centres | Outside | A | B | C |
|---|---|---|---|---|---|---|
| RF48140 | 2 × 5mm (2 × 3/16") | 37mm (1 7/16") | – | – | – | – |
| RF48151 | 2 × 6mm (2 × 1/4") | 30mm (1 3/16") | – | – | – | – |
| RF45711 | 2 × 6mm (2 × 1/4") | 83mm (3 1/4") | 30 × 105mm (1 3/16 × 4 1/8") | 58mm (2 1/4") | 23mm (15/16") | 33mm (1 5/16") |
| RF45711HL | 2 × 6mm (2 × 1/4") | 83mm (3 1/4") | 30 × 105mm (1 3/16 × 4 1/8") | 58mm (2 1/4") | 23mm (15/16") | 33mm (1 5/16") |
| RF45711N | 2 × 6mm (2 × 1/4") | 75mm (2 15/16") | 26 × 95mm (1 × 3 3/4") | 58mm (2 1/4") | 19mm (3/4") | 33mm (1 5/16") |
A, B, C are the exit-block dimensions shown in the drawing on page 3 of the PDF. Page 4 holds 1:1 shadow/drilling templates for RF48151, RF45711, RF45711HL and RF45711N (Ø 6.5mm holes): print on A4 at 1:1 and check the printed dimensions before drilling.
Care and Maintenance
- Grit and sand damage the bearing system: flush blocks, especially the bearings, with fresh water regularly and clean them periodically with mild detergent and water.
- Dry lubricants such as Ronstan Sailfast™ silicon spray may be used on the bearings and ratchet controls. Never use oil or petrochemical-based lubricants.
- Orbit Blocks are designed and made for use on sailboats.
- Lashing and soft attachments must be correctly installed, inspected regularly and replaced when necessary, on a smooth, well-rounded mounting point without sharp edges or burrs.
Need a part that isn't listed? Ask us to source it and quote the part number from the PDF.
Products in this Manual
-


Ronstan S40 BB Orbit Block,Triple,Becket,Swivel Shackle
RONRF48310
$143.46 USDUnit price /Unavailable -
-
Ronstan Series 40 RTA OrbitBlock,Auto, Single, Swivel Head
RONRF46100
$77.33 USDUnit price /Unavailable -
Ronstan S40 BB Orbit Block,Double,Becket Option,Lashing
RONRF48209
$68.54 USDUnit price /Unavailable -
Ronstan S40 BB Orbit Block,Single,Becket Option,Lashing
RONRF48109
$35.16 USDUnit price /Unavailable -
-
Ronstan S40 RT Orbit Block,Triple,Becket,Cleat,Swivel
RONRF46330
$328.19 USDList Price: $386.10 USDUnit price /Unavailable -
Ronstan Series 40 RTM OrbitBlock,Manual, Single, Swivel
RONRF46100M
$77.33 USDUnit price /Unavailable -
RONRF45711HL
$201.59 USDList Price: $237.17 USDUnit price /Unavailable -
-
Ronstan Series 40 BB Orbit Block, Single, Becket, Swivel Head
RONRF45110
$34.55 USDUnit price /Unavailable -
-
Ronstan S40 BB Orbit Block,Quin,Becket,Swivel Shackle
RONRF48510
$214.72 USDList Price: $252.61 USDUnit price /Unavailable -
Ronstan S40 BB Orbit Block,Quin,Swivel Shackle
RONRF48500
$205.73 USDList Price: $242.03 USDUnit price /Unavailable -
Ronstan S40 BB Orbit Block,Quad,Becket,Swivel Shackle
RONRF48410
$189.59 USDList Price: $223.05 USDUnit price /Unavailable -
Ronstan S40 BB Orbit Block,Quad,Swivel Shackle
RONRF48400
$180.60 USDList Price: $212.47 USDUnit price /Unavailable -
Ronstan S40 BB Orbit Block,Triple,Becket,Cleat,Swivel Shackle
RONRF48330
$234.42 USDList Price: $275.79 USDUnit price /Unavailable -
-
Ronstan S40 BB Orbit Block,Double,Becket,Swivel Shackle
RONRF48210
$103.00 USDUnit price /Unavailable -
-
-
-
Ronstan S40 BB Orbit Block,HHL,Single,Becket Option,Lashing
RONRF48109HL
$175.62 USDList Price: $206.61 USDUnit price /Unavailable -
Ronstan S40 RT Orbit Block,Quin,Becket,Cleat,Swivel
RONRF46530
$581.71 USDList Price: $684.37 USDUnit price /Unavailable