



Selden Backstay Flicker — Instructions

Sizes by boat length, what is in the box, clearances and step-by-step fitting for the Selden backstay flicker, including the keelboat version.
Download PDF ▾

Choosing & Using a Backstay Flicker
| Part No. | Model | Boat LOA | |
|---|---|---|---|
| 511-120-01 | Backstay flicker small | <30 ft. | View part → |
| 511-121-01 | Backstay flicker medium | 30-37 ft. | View part → |
| 511-123-01 | Backstay flicker large | 37-43 ft. | View part → |
| 511-120-03 | Keelboat backstay flicker small (L=1200mm) | Keelboats <26 ft. | View part → |
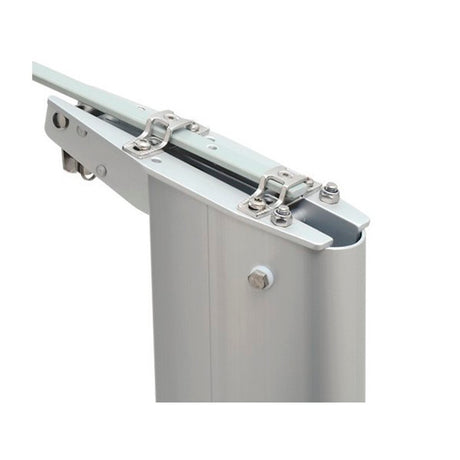
- Fractional rigs only. Fitted on top of the headbox, it pulls the backstay clear of the sail when gybing and tacking.
- It carries ONLY the weight of the backstay – not runners or checkstays.
- It does not replace accurate mast tuning ("Hints and Advice" 595-540).
- Lights, antennas and wind indicators may need moving: keep at least 5 mm clearance between the flicker (bent to sailing position) and masthead equipment, and make sure the backstay does not touch the aft edge of the mast in working position.
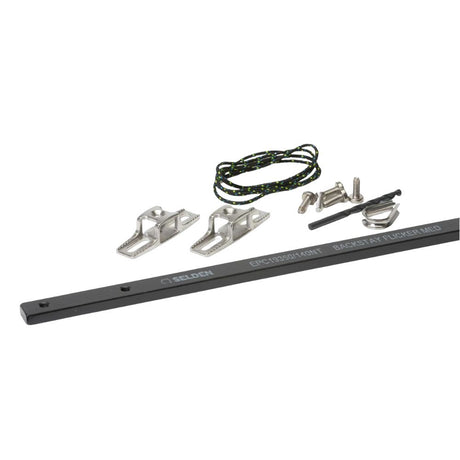
Parts Included
511-120-01 / 511-121-01 / 511-123
| Part No. | Description | |
|---|---|---|
| 508-700 | Bracket backstay flicker (2) | View part → |
| 155-701 | M6 self tapping screws (4) | View part → |
| 162-026 | M5 screw | Ask us to source it → |
| 307-104 | Thimble | Ask us to source it → |
| 592-006 | Drill bit Ø 5.3 mm | Ask us to source it → |
| 613-052 | Rope 0.8 m | Ask us to source it → |
| 595-993 | Instructions for assembly | Ask us to source it → |
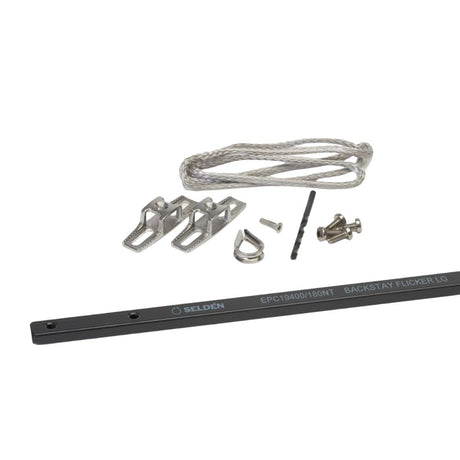
Keelboat 511-120-03
| Part No. | Description | |
|---|---|---|
| 511-120-02 | Backstay flicker L=1200mm | Ask us to source it → |
| 151-095 | M6S 6x20 bolt (2) | Ask us to source it → |
| 164-407 | M6 nyloc nut / M6 washer (2 each, both listed as 164-407, as printed) | Ask us to source it → |
| 307-104 | Thimble | Ask us to source it → |
| 613-236 | Rope ø3 Black Magic, L=1000mm | Ask us to source it → |
Standard Flicker
- Drill the bracket holes with the Ø5.3 mm bit, brackets at least 100 mm apart. Do not drill into the mast walls.
- Brackets can be cut down for smaller headboxes.
- Insulate the brackets from the aluminium headbox (sealant or thick tape).
- Coat the stainless self-tapping screws with waterproof grease, Vaseline or anti-corrosive paste. Leave room for halyards and sheaves below.
- Fit the thimble to the backstay.
- Slide the flicker into place and fit the locking screw in the hole at its end. Do NOT drill the flicker at the aft bracket.
- Tie the line round the flicker with running knots and the block round the thimble.
- Adjust the line to approximately 100 mm.
Keelboat Flicker
- Assemble flicker, bolts, washers and nuts; grease the stainless parts against corrosion of the aluminium head box.
- Slide the bolt heads into the upper channel of the headbox, as far forward as possible; the aft bolt at least 15mm forward of the headbox aft edge. Tighten.
- Open the thimble, slide it onto the backstay and close it.
- Tie the black line round the thimble with a running knot, angled so it ends up central.
- Tie the line round the flicker with a running knot. Adjust so that with the backstay slack it is just clear of the sail and the flicker is not bent.
- Cut off excess line and heat-seal the end.
Need a part that isn't listed? Ask us to source it and quote the part number from the PDF.
Products in this Manual
-


Selden Backstays - Flicker (Small) - Boat Size: Up To 30 ft (9.1 m)
SEL51112001
$260.00 USDList Price: $303.00 USDUnit price /Unavailable -
-

Selden SCREW MRT-TT 6x16 (SELFT) ST
SELDEN-SCREW-MRT-TT-6X16-SELFT-ST
$9.99 USDUnit price /Unavailable -
Selden Backstay Flicker for Keelboat Sections C080-C139, 1200x19x7 mm
SELDEN-BACKSTAY-FLICKER-KEELBOAT
$214.00 USDList Price: $252.00 USDUnit price /Unavailable -
Selden Backstays - Flicker (Large) - Boat Size: 37 to 43 ft (11.4 to 13.1 m)
SEL51112301
$415.00 USDList Price: $484.00 USDUnit price /Unavailable -
Selden Backstays - Flicker (Medium) - Boat Size: 30 to 37 ft (9.2 to 11.3 m)
SEL51112101
$330.00 USDList Price: $380.00 USDUnit price /Unavailable